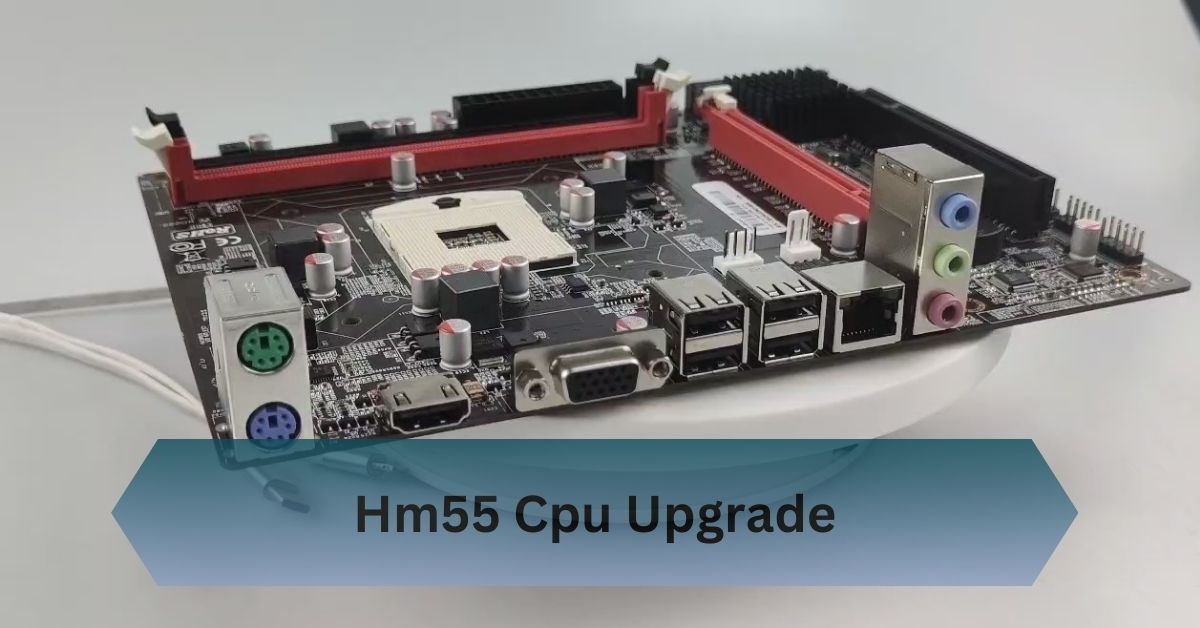
Upgrading my HM55 laptop from an i3 to an i7-720QM significantly boosted its performance, making it faster and more capable for demanding tasks. The upgrade was simple, and gave my old laptop a new lease on life.
Upgrading your HM55 laptop’s CPU can greatly enhance performance and multitasking, making your older device faster and more efficient for demanding tasks.
“Boost your laptop’s speed and performance with an easy HM55 CPU upgrade!”
Table of Contents
Understanding the HM55 Chipset
Before proceeding with the upgrade, it’s essential to understand the HM55 chipset and its significance. Introduced in 2010, it is part of Intel’s mobile platform and is primarily found in laptops that use the first-generation Intel Core processors (often referred to as Nehalem and Westmere architectures).
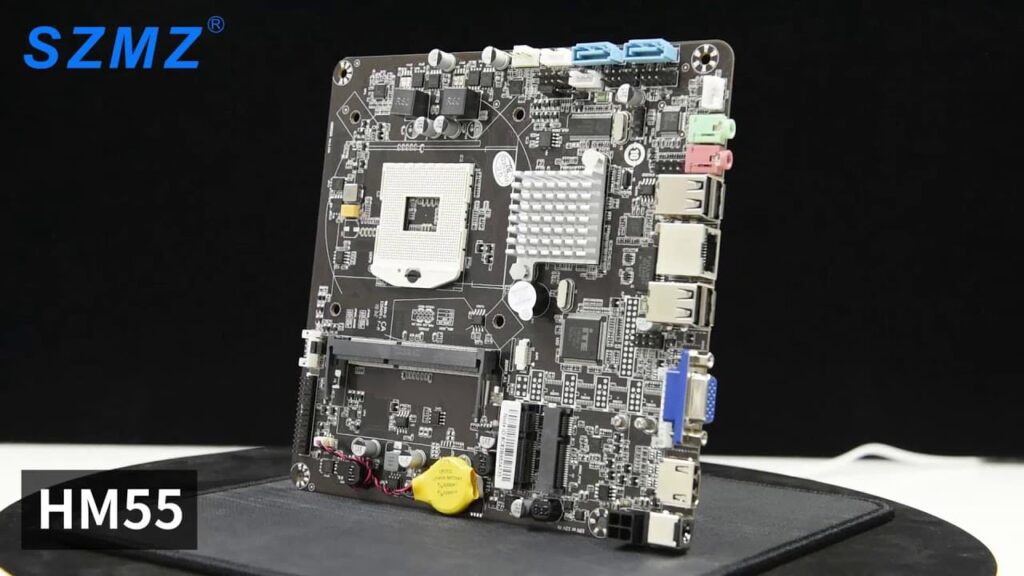
This chipset supports various processors, including Intel Core i3, i5, and i7 models, making it versatile for both casual and power users.
Why Upgrade Your HM55 Laptop CPU?
- Performance Boost: Upgrading from an i3 to an i5 or i7 can significantly improve your laptop’s ability to handle more demanding tasks, such as video editing, gaming, and multitasking.
- Extended Lifespan: A new CPU can extend the life of your laptop, delaying the need for a completely new machine.
- Cost-Effective: Compared to buying a new laptop, a CPU upgrade is relatively affordable and can provide similar performance enhancements.
Selecting the Right CPU for HM55
- Socket Compatibility: Ensure the CPU fits Socket G1 (rPGA 988A).
- Processor Options: Compatible CPUs include Intel Core i7-720QM, i7-820QM, i5-520M, i5-540M, and i3-330M.
- Thermal Design Power (TDP): To avoid overheating, choose a CPU with a TDP similar to or lower than your current one.
- BIOS Support: Check for BIOS updates to ensure compatibility with the new CPU.
- Performance Goals: Select a CPU that meets your performance needs, whether for basic tasks or intensive applications.
Read Also: Cpu Core Ratio Sync All Cores Or Auto – Optimize Your Performance!
The Benefits of Upgrading
- Faster Processing: More cores and higher clock speeds mean your laptop can handle tasks more efficiently, reducing lag and improving overall responsiveness.
- Better Multitasking: An upgraded CPU can juggle more tasks simultaneously, making it ideal for users who run multiple applications at once.
- Enhanced Gaming Experience: For gamers, a more powerful CPU can improve frame rates and overall gameplay, especially in CPU-intensive games.
Key Considerations Before Upgrading

BIOS Compatibility:
Your laptop’s BIOS needs to support the new CPU. Without proper BIOS support, the new processor might not work correctly or at all. Before purchasing a new CPU, check with your laptop manufacturer for any available BIOS updates. These updates often include support for newer processors.
Thermal Management:
Laptops have limited cooling capabilities, and installing a CPU with a higher TDP than your current one can lead to overheating. Overheating can cause thermal throttling (where the CPU reduces its performance to cool down) or even permanent damage. Make sure your laptop’s cooling system can handle the upgraded CPU’s heat output.
Warranty Considerations:
Upgrading the CPU in your laptop might void your warranty, especially if the laptop is still under the manufacturer’s warranty. It’s crucial to weigh the benefits of the upgrade against the potential loss of warranty protection.
How to Upgrade Your HM55 CPU?
Step 1: Assemble the Required Tools and Components
- The New CPU: Ensure it’s compatible with the HM55 chipset and Socket G1.
- Thermal Paste: To ensure proper heat transfer between the CPU and the cooling system.
- Screwdrivers: A set of precision screwdrivers to open your laptop.
- Antistatic Wrist Strap: To prevent static damage to your laptop’s components.
Step 2: Prepare Your Laptop
- Backup Your Data: Before making any hardware changes, back up all your important data. While the upgrade process doesn’t typically involve your storage drive, it’s better to be safe than sorry.
- Power Down and Unplug: Turn off your laptop, unplug it from the power source, and remove the battery (if possible).
Step 3: Disassemble Your Laptop
- Remove the Back Panel: Use your precision screwdrivers to remove the screws securing the back panel. Keep the screws organized as you’ll need to reassemble the laptop later.
- Locate the CPU: The CPU is typically located under the cooling system, which includes a heat sink and fan.
Read Also: Pfsense Cpu Doesn’t Support Long Mode — Enhance Network Stability!
Step 4: Remove the Old CPU
- Detach the Cooling System: Carefully remove the screws holding the heat sink and fan in place. Lift the cooling system off the CPU.
- Unlock and Remove the Old CPU: The CPU is usually secured in place by a locking mechanism. Carefully unlock it and remove the old CPU.
Step 5: Install the New CPU
- Install the New CPU: Place the new CPU into the socket, ensuring it’s properly aligned. Lock it in place.
- Apply Thermal Paste: Apply a small amount of thermal paste to the top of the CPU. This will help with heat dissipation when the cooling system is reattached.
- Reattach the Cooling System: Carefully place the heat sink and fan back over the CPU and secure it with screws.
Step 6: Reassemble and Test
- Reattach the Back Panel: Once the CPU is in place and the cooling system is secured, reattach the back panel of your laptop.
- Power On: Reinsert the battery, plug in the laptop, and power it on. If everything is installed correctly, your laptop should boot up as usual.
Step 7: Verify the Upgrade
- Check BIOS: Enter the BIOS during startup (usually by pressing F2, DEL, or ESC) and verify that the new CPU is recognized.
- Run Stress Tests: Once in the operating system, run stress tests and monitoring software (like CPU-Z or HWMonitor) to ensure the CPU is functioning correctly and temperatures are within safe limits.
Solutions of Issues while upgrading

Laptop Won’t Boot:
If the laptop doesn’t boot, double-check that the CPU is properly seated and the cooling system is securely attached. Ensure all connections are reattached, including the battery and any internal cables.
Overheating:
If the laptop is overheating after the upgrade, check the thermal paste application and ensure the cooling system is functioning correctly. You may also need to clean the fan and vents to improve airflow.
Unrecognized CPU:
If the BIOS doesn’t recognize the CPU, make sure your BIOS is up-to-date. If it’s already the latest version, the CPU might not be fully compatible with your laptop’s motherboard.
Frequently Asked Questions:
1. What is the Intel HM55 Express Chipset driver?
The Intel HM55 Express Chipset driver is software that ensures proper communication between the chipset and your operating system. It provides stability and functionality for hardware components like the CPU and memory.
2. How does the HM55 compare to the X99 chipset?
The HM55 is a mobile chipset for older Intel Core processors with basic features, while the X99 is a high-end chipset for Intel’s enthusiast and workstation CPUs, offering advanced features and support for newer technologies.
3. What CPUs are compatible with an HM55 motherboard?
An HM55 motherboard supports Intel CPUs with Socket G1 (rPGA 988A), including Core i3, i5, and i7 processors from the first generation. It’s designed to work with these older Intel chips for improved performance in compatible laptops.
4. How will an HM55 CPU upgrade affect battery life?
An HM55 CPU upgrade may impact battery life as higher-performance CPUs can consume more power. Monitoring battery performance after the upgrade is advisable.
Conclusion:
Upgrading the CPU in your HM55 laptop can significantly boost its performance and multitasking capabilities, resulting in faster speeds and improved efficiency for handling demanding applications and tasks.
Read Also:


